 I’m still all aglow in the excitement of working with PMC STERLING. To me, this is the holy grail of jewelry clays. It’s affordable, it’s easy to work with, easy to fire, strong and most importantly, I’m working directly in a metal that is desirable all over the world.
According to the insert for PMC STERLING, a double firing is required to transform it from powdered to solid metal. The first firing is supposed to be on an open kiln shelf for 30 minutes at 1000F and then another 30 minute firing at 1500F buried in carbon. Since I’m lazy and since the open air firing sounded too slow, I decided to speed it up.
Skip the First Firing
I found that I can ignite the binder with a torch and skip the entire first firing, saving both time and energy. Here’s how I do it: Turn the lights down. Make a soft, bushy flame with the torch and light the greenware on fire. Watch as the flame eats through the whole piece. If you can’t tell if it’s all burned out, light it again. Then cool and embed in coconut carbon and fire at 1500F for at least 30 minutes.
Here are some more tips for working with PMC STERLING.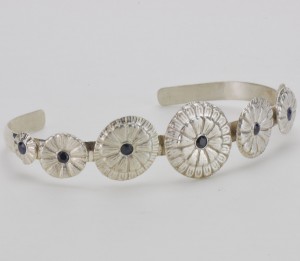
Co-Firing Findings & Settings
Any item of sterling silver, as long as it does not contain solder can be embedded and fired in place. If something has solder, it could fall apart or be seriously weakened during firing. Wire, laser-welded and die-struck settings can safely be fired in place. I highly recommend torch burnout if you plan to co-fire sterling silver parts to avoid heating copper in the open air. When copper is heated above 1200F for more than 30 minutes, it becomes incredibly brittle. Heating to 1000F is going to cause deep fire scale that can be avoided by not heating unprotected for so long. And though it might not be 1200F, it’s still going to weaken the metal, and that’s unacceptable for jewelry. Carbon firing, on the other hand, protects sterling silver from the combined damage of heat and oxygen.
Using Paste as Solder
 PMC STERLING dust makes fabulous paste that can be used to attach greenware to greenware, sterling to greenware, or any combination of unfired, burned out, or fired clay. I add a little water to make a thick paste and then glue parts together. Prime the places that will be bonded by painting them with thinned paste. Dry and then apply the thick paste to the primed areas. This helps it stick better.
Whatever paste you don’t use, spread it thin so it’s easy to rehydrate. To rehydrate, add water a bit at a time until you reach the desired consistency. It rehydrates beautifully over and over again.
Co-Firing Gemstones
Use my Gemstones in Metal Clay guide to find which stones are safe in carbon. If they are safe in carbon, they are most likely safe for torch burnout because the temperature is so low and it’s so quick. What damages stones is the oxygen and heat combination for long periods of time.
 Make sure you get the table level when you set stones. Crooked stones have a better chance of being ejected during firing.
You’ll have to set glass after firing since it can’t handle a carbon firing.
Firing Time
30 minutes is the minimum firing time for PMC STERLING. Firing time can be extended for extra strength. Pieces that were pasted on low dome wire and fired only 30 minutes broke off when I formed it on a mandrel. After re-pasting and re-firing for 2 hours, the pieces were as good as soldered on.
Soldering
PMC STERLING is no different to solder than any other sterling silver. Use the type of solder that you are comfortable working with. Pickle and polish like any other sterling silver.
How Far Does it Go?
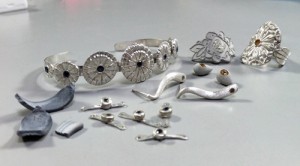
This photo represents everything I’ve made so far with one 25 gram package, and I still have some left. What you see in the photo is as follows, from left to right:
- A ring shank in 3 pieces that I broke on the way to the kiln. (tragedy!) This is what the clay looks like after burning out the binder with a torch.
- A cuff bracelet with blue sapphires. The sapphires elements were fired in place and bonded to low dome sterling wire. The first firing was too short and was not strong enough. Re-fired for 2 hours.
- Blue sapphires bonded onto sterling links. Made with leftovers.
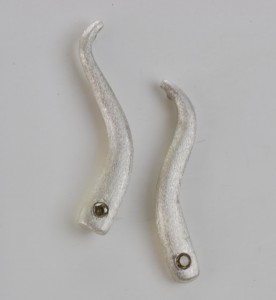
- Squiggle earrings with yellow diamonds. Diamonds fired in place. Posts attached using hard paste solder.
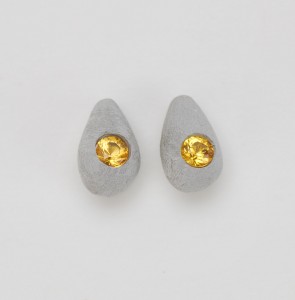
- Unfired egg earrings with gypsy set yellow sapphires. I used a traditional gypsy setting technique to set these stones in the unfired clay. The dry clay is really strong. The stones snapped into their settings with a click.
- Unfired ring top with 1.03 carat cushion cut diamond. I’m not sure how I want the prongs yet. Shank not shown.
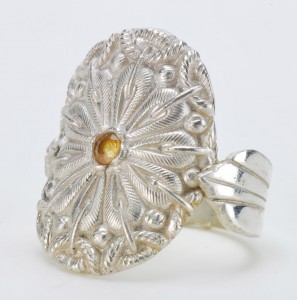
- Yellow sapphire ring (with replaced shank). I dropped this ring on the way to the kiln and had to replace the shank. The idea behind this ring was to see how strong a ring could be with a very small area where the parts join. To be sure of the strength, I fired this for 2 hours and then rounded it on a ring mandrel.
…and I still have about 5 more grams plus a bunch of dust and paste.
That’s a nice pile of jewelry out of one package of clay. It’s going a lot further because I know it’s strong so I can make pieces more delicate and thinner, and that saves a lot of material.
Stay tuned for the results of the big diamond ring firing experiment!
-Mardel

