While I usually create jewelry for my projects here at Cool Tools, one can only make so many rings before deciding to create a decorative dish or container to keep them in; so for this project, I set out to make myself a container to store some of my favorite pieces in. This project ended up being a bit of an exploration into testing the working qualities of Aureus Bright Bronze clay, and I’m happy to report that after creating this piece, I plan on using it more often.
When planning this piece I decided I wanted my container and the lid to come together to create a round and dome like form. So first thing first, I needed to find something to form the clay around. I can’t be the only one who torments my family by taking household objects into my studio to sacrifice them to a purpose entirely other than what they are intended. In this case, I grabbed an ornament off our Christmas tree. It was the perfect size, and as a bonus it had a nice shiny surface that lent itself to being non-stick. I created the body of the container, and the lid as two separate pieces, as the ornament did have a hanging element on the top that prevented me from forming the container as one piece and cutting it in half as I usually like to do when creating lidded objects. This meant I had to spend some time sanding the two components flat so they lined up and fit well together. When joining the pieces together, I knew I was creating structural connections and wanted the seams to be secure. I knew there could be some warping in the kiln and didn’t want my piece to pull apart at a seam, so I used a slip that I created from the lump clay that was the consistency of a slightly thick paste to join the elements of the lid together and to the piece itself. After I added components for the ring-in-ring style lid, I double checked that I was happy with the fit and how the lid lined up before setting out to embellish the container.
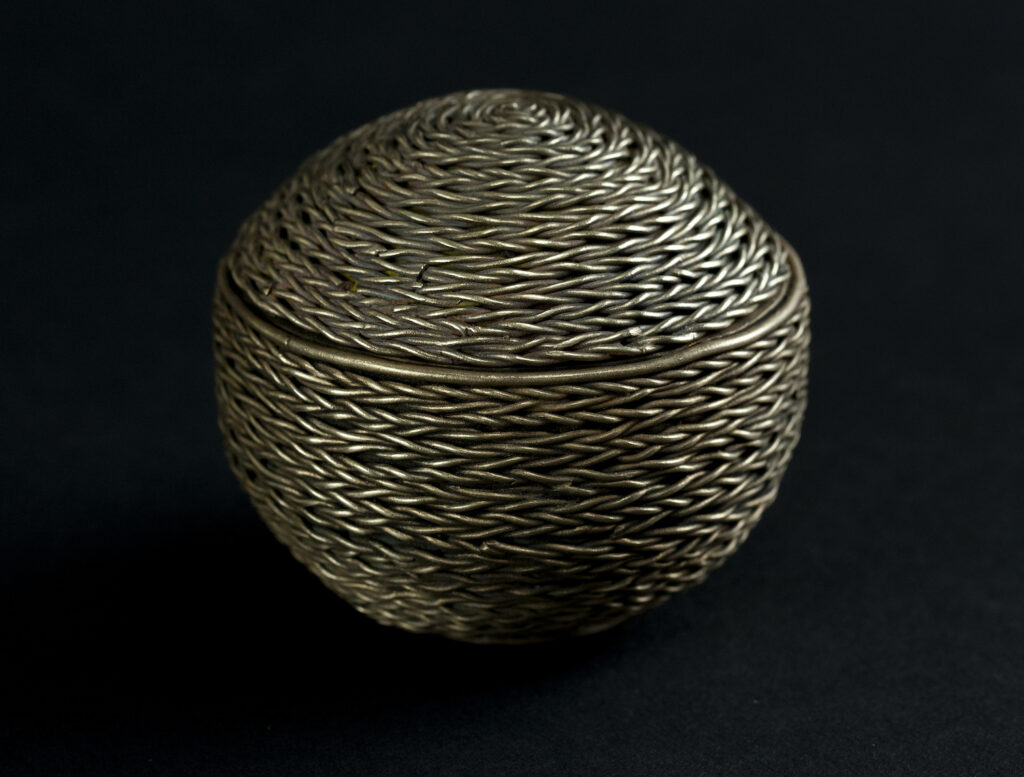
I knew I wanted this container to have a woven or braided look to it, and used an extruder to create lots of coils that I then twisted and lined up to create a woven look. For joining the coils to the container, I used a slightly thinner paste, more like the consistency of acrylic paint. I wanted it to be thin enough that I could paint it on and it would settle, so I could maintain the crips lines on the coils without having to worry about extra slip pushing up around edges to create a more sloppy looking connection. I was really happy with the way that the linear nature of this embellishment accentuated the form of the container, and gave it a quick overall sanding before firing it.
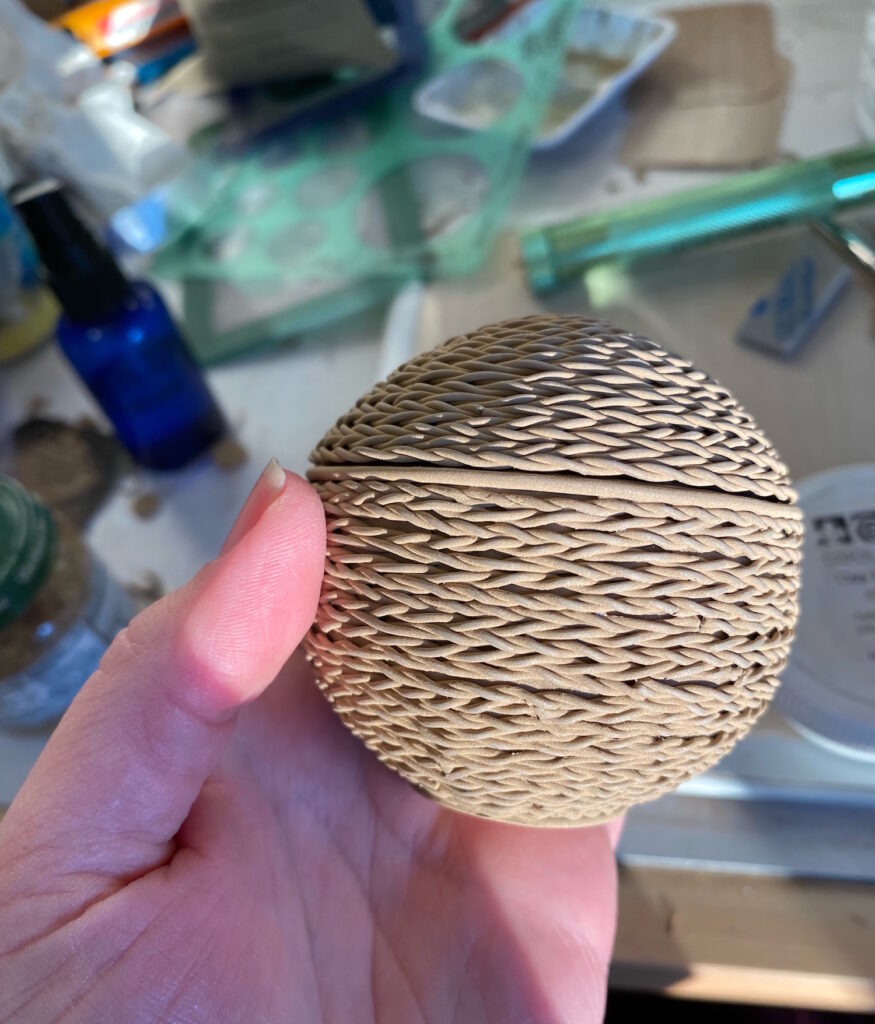
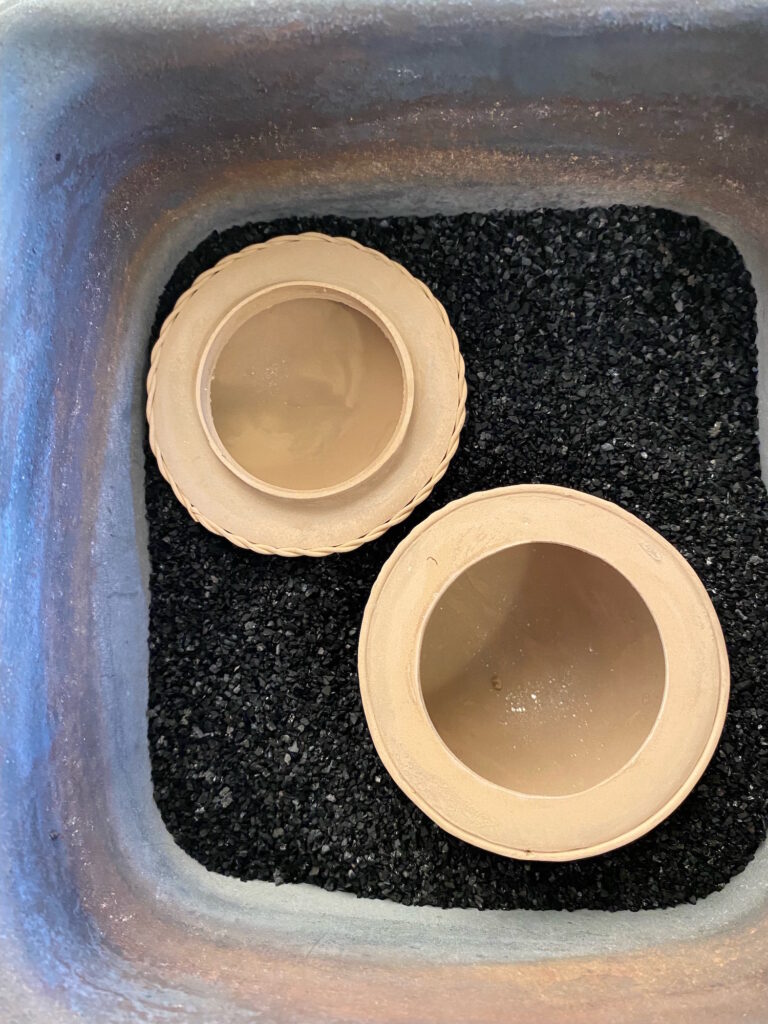
The whole time I was working on this piece, fussing over the lid fitting perfectly, making sure the edges lined up, I was very aware that this piece could potentially warp as it shrunk and that things would no longer fit so well. When I set out to create this piece, I knew it was a risky one and that I might end up with a pretty sizable piece to send off for refining, but my creative practice is consistently motivated by asking “what if?” And “it might not work, but wouldn’t it be great if it did?” So I did what I could to hopefully lower the amount of warping by setting my kiln to have a slow ramp, hoped the carbon would support the form some, and hoped the structure of the dome form and the added support from the lid elements would help it keep its shape, and pushed the start button on my kiln. After two phases of firing and an evening spent in anticipation, I dug out my pieces, put them together, and noticed that as expected it had warped some. Overall I was very pleased, but one of the edges didn’t line up as evenly as it had before being fired. I decided to see if I could correct the form at all by using a mallet to try to nudge the form back in the right direction. I was surprised by the strength of this sintered bronze, and ended up having to really exert some force on it with a rawhide mallet, but was able to move the material enough using that method to be satisfied with the way the lid fit.
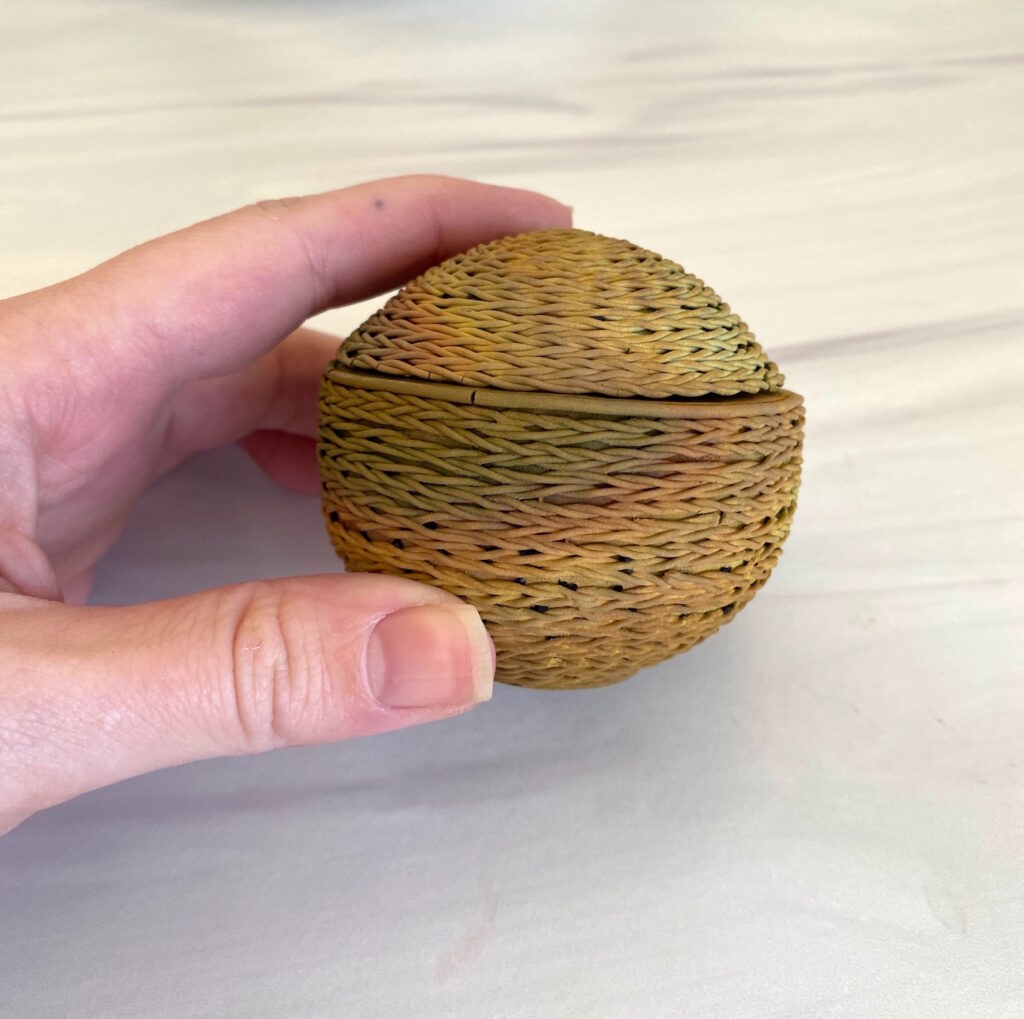
I was really happy with not only this finished container, but with what I learned along the way while creating it. The method of using a thinner slip to apply the coils seemed to work, as even on the areas that I adjusted with a mallet, the added coils stayed firmly attached. None of my seams ripped open either despite the warping in the kiln, so I was really happy with the way this clay joined together. The elastic nature and long working time of the Aureus Bright Bonze clay provided plenty of time for me to extrude the coils, twist them, and apply them to my piece all without them cracking. I enjoyed the challenge of this piece and was really satisfied with the performance of the Aureus Bright Bronze clay; I look forward to trying some more projects like this in the future.
