Cool Tools Blog

Deb DeWolff: Torched Enamel Flower Earrings

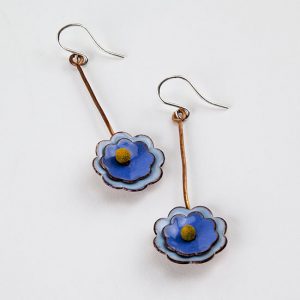
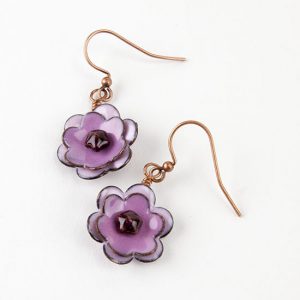
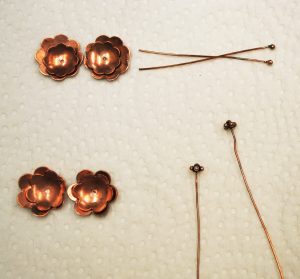
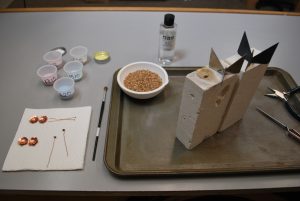
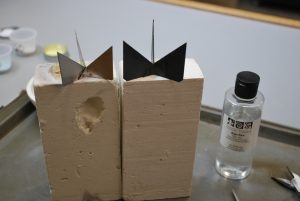
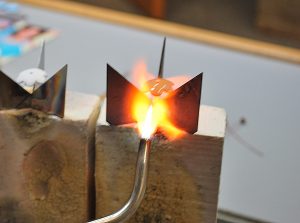
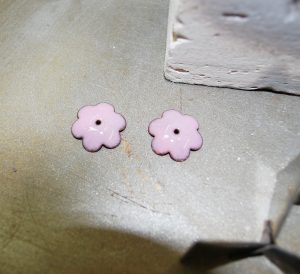
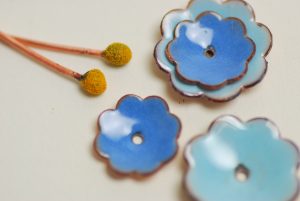
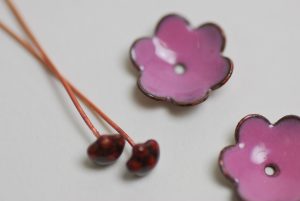
    This is one of my first forays into the technique of torch firing enamels on my own after taking a class. I made these two pairs of enameled earrings in a day.  
The copper shapes I used are 24 gauge flower copper shapes. The copper headpins I chose were an ordinary balled end headpin for the blue flowers and a fancy flower shaped one for the pink flowers. You can make your own balled headpins out of copper wire. Our video shows you how. I drilled holes in the center of each flower shape with a Foredom Flex-Shaft machine. I then domed the shapes using a dapping set. The larger of the two shapes I domed only slightly, and the inner flower was domed a bit more to help it stand out.
All of the copper was thoroughly cleaned with Penny Brite prior to enameling. This photo is my plan for colors that I used. All of the enamels I used are Thompson Enamels and all are opaques with the exception of the rose pink for the headpins on the pink flowers. This one is a transparent enamel.
This shows all of the materials I used, except for the torch. I used a propane torch but you could also use a MAP gas torch or even a smaller butane torch. Butane torches often do not get hot enough and run out of fuel faster. I would advise using a larger torch. You’ll have better results and experience less frustration.
I set up two firing bricks on the end so that I could get under the pieces more easily and used two trivets so that I could fire both pieces together, one right after the other. I brushed a very thin coat of the Klyr-Fire (diluted 50/50 with water) on the copper before sifting enamel on the piece to help the enamel powder stick. I used a small 40 mesh sifter.
You need to let the Klyr-Fire dry before you apply the torch to the pieces. This photo shows how to set them in the trivet and how the torch is applied from underneath. Hold the torch just until the surface of the enamel has gone to the glassy stage.
First it will look wet, then it will look like sugar, then like an orange peel, and finally glass (which is really what enamel is). I put two coats of the lighter pink on these pieces because the first coat didn’t cover enough.
Headpins are harder to do and I need some more practice! Hold the tip of the headpin in the “sweet spot” of the torch flame (just beyond the inner blue flame) until the metal is orange. Then immediately dip the headpin in the enamel. Put the enamel in a metal container for this and keep the enamel close to your flame but not close enough to burn it or yourself. The metal has to go into the enamel powder before it cools off – very, very quickly. If your enamel is too far from the torch the headpin will cool off too much for the enamel to stick. After dipping the headpin in the enamel, bring it back to the flame and heat the tip again to fully melt the enamel. As shown in this picture of the yellow headpins, I left a “sugar” coat for the last layer, which is when the enamel is fused but doesn’t have enough heat applied to fully melt it to a glossy surface.
I was going to dip these flower shaped headpins in white opaque enamel before dipping them in the transparent rose color, but they looked much better with just the transparent over the copper.
The earrings were finished with simple wire forming techniques. I twisted the headpin wire just behind the flowers to make them stand up vertically.
Sterling earwires were used on the blue earrings.
    Note: Please make sure you take all the safety precautions necessary for working with an open flame, but do consider trying torch fire enameling. It’s easy and really, really fun!

Leave a Comment

Your email address will not be published. Required fields are marked *