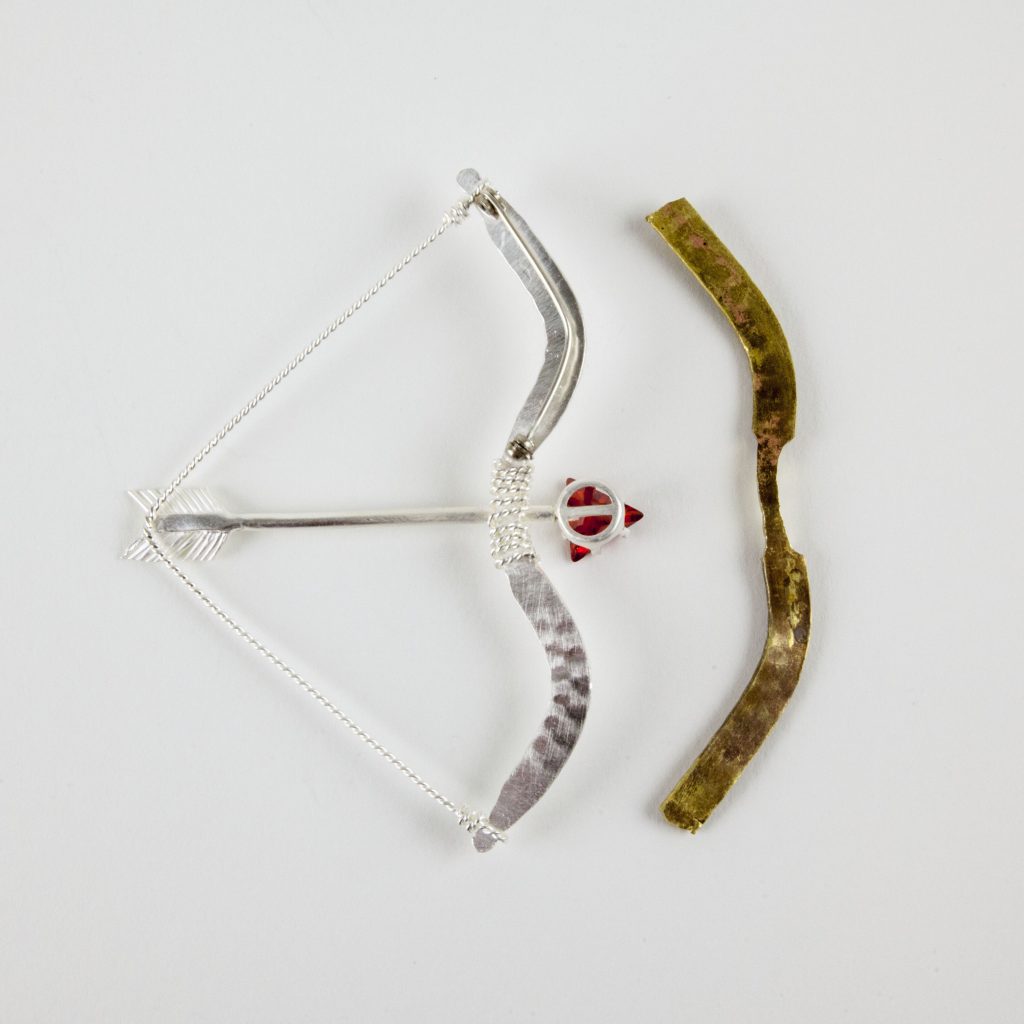
Back of Brooch with the sample “trial and error” piece I made out of brass.
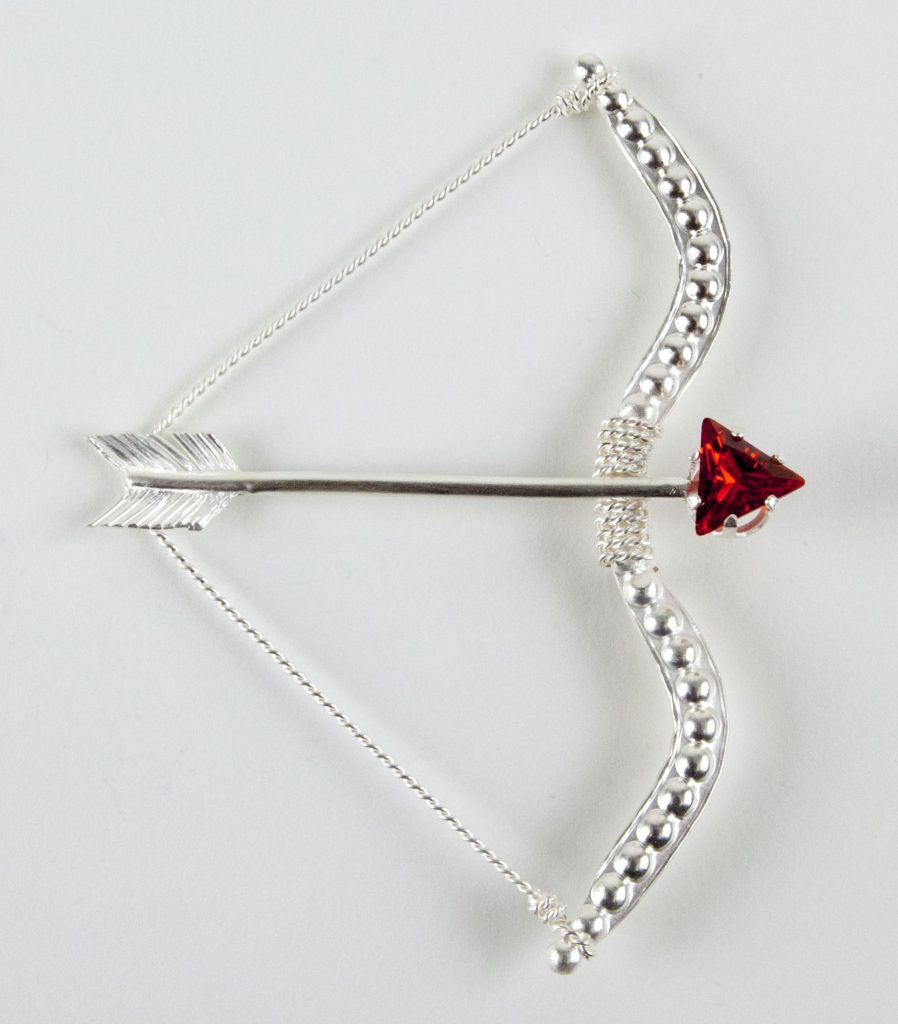
What is Valentines Day without Cupid and his bow and arrow? ( See below for materials and tools used)
I began this project with a quick simple sketch to work out the ideal size and shape of “Cupid’s Bow and Arrow” Brooch. I knew that getting the bends in the sterling silver patterned wire “Dotted” would be a little tricky, because the bends would need to occur where the wire was the thickest. Before I attempted to bend the sterling wire, I made a sample in brass, a cheaper material for trial and error.
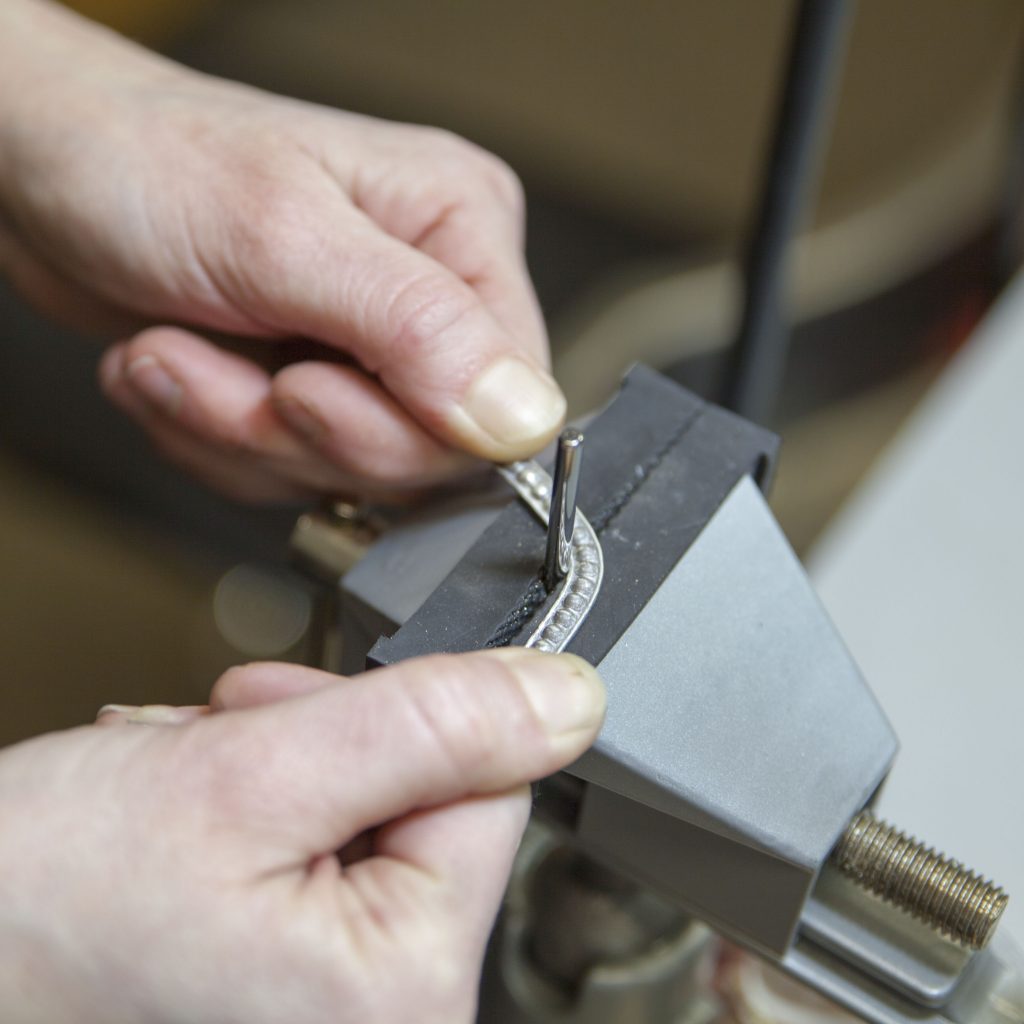
I marked the center, and where I wanted the two main bends to be on the wire. I used a 4mm jump ring maker mandrel in a vise to bend the metal. I bent the two outer bends in the bow to create a U shape with the wire. The metal needed to be annealed a couple times to get the desired bends. I did not initially worry about the bend in the middle, because I removed material with a saw making it much easier to bend after the two main bends were in the wire. I then repeated the process in the silver wire. Then I removed material to create a slight tapper on both ends leaving just the dot on the ends. I also added a tapper toward the middle bend. Once I got the desired shape for the bow, I filed, sanded and polished the tappers and smoothed out the bends. I soldered the pin henge and catch to the back of the bow with hard solder.
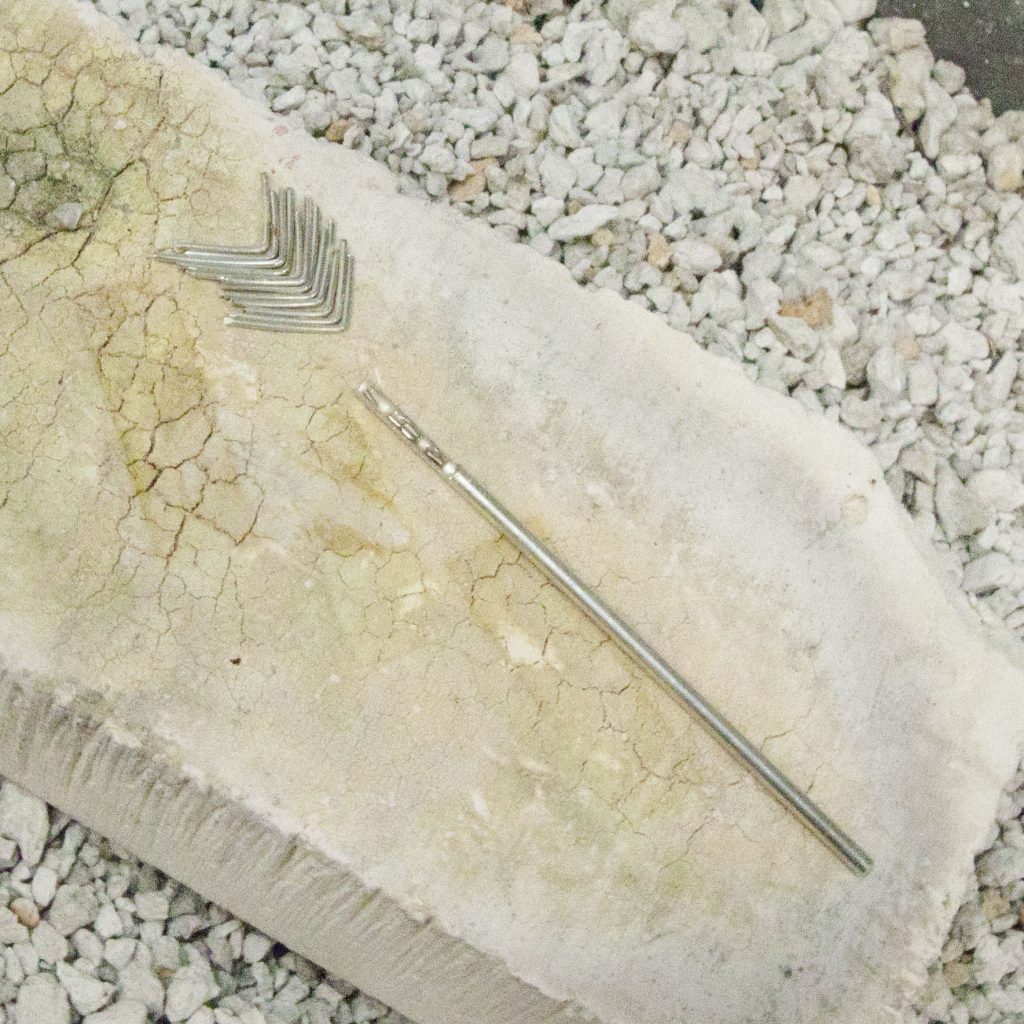
Next, I started constructing the arrow by taking 18 gauge sterling silver wire and making 10 pieces that were approximately 3/4” long with a 90° bend in the middle to make the fletching. I lined the pieces up so that they fit snuggly together. I cut the tubing to a 3” length, and removed part of the tubing on a 1/2” area at the end of the tubing exposing the inside. Then I flowed hard solder in the exposed inside of the tubing and pickled it. After pickling, I placed it on top of the 18 gauge wire pieces, and reflowed the solder to attach the pieces. Next, I soldered the other end of the arrow to the middle of the bow leaving enough space to solder the stone setting to the end of the tubing. Next, I soldered on the stone setting completing the arrow.
I took 7” of the the sterling silver patterned wire “Rope #2”, bent it in the middle, and soldered it to the back of the fletching with medium solder. After it was soldered, I took the ends of the “Rope #2” wire and wrapped them around the ends of the bow so that the wire nested into the niches that were made around the dot. I wrapped the wire around itself to create a tide rope effect, cutting of the excess wire so that the end is in the back of the piece. I took the remaining 5” of the rope wire, placed the middle of it behind the bow where the arrow attached, and wrapped it around the bow.
I did all my final sanding and polishing then raised the fine silver. The last few details were setting the cubic zirconia, and put the pin stem on. I put a bend in the pin stem so that it hid behind the bow. I finished of the piece by brass brushing it to create a soft finish on the silver.
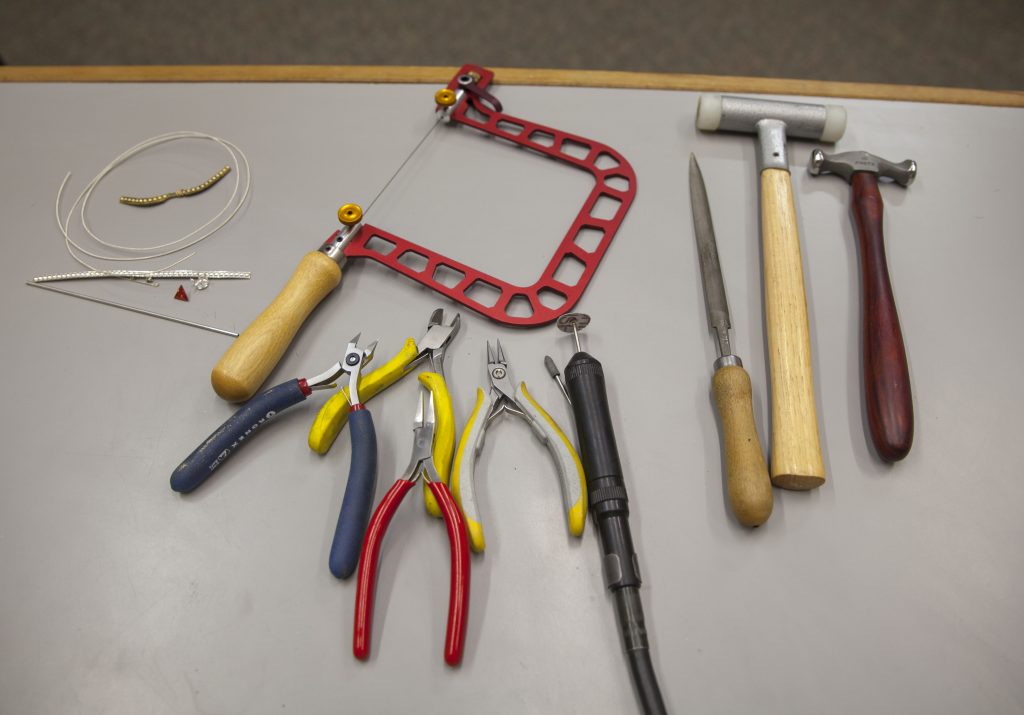
MATERIALS USED:
CUBIC ZIRCONIA – FIRE OPAL – TRIANGLE 10mm
STERLING SILVER 10MM ROUND SNAP-SET – 6 PRONG SETTING – SET/2
STERLING SILVER TUBE – .089″ OD, .009″ WALL
PATTERNED WIRE – STERLING SILVER – DOTTED 12 GAUGE DEAD SOFT – 6″
PATTERNED WIRE – STERLING SILVER ROPE #2 – 16 GAUGE DEAD SOFT – 6” (x2)
WIRE- STERLING SILVER – 18 GAUGE HALF HARD – 1 FOOT
STERLING SILVER PIN FINDING – 2”
TOOLS:
KNEW CONCEPT HAND SAW WITH CAM-LEVER TENSION AND SWIVEL BLADE CLAMPS – 5”
HALF ROUND RING FILE WITH WOOD HANDLE – CUT 4
HAMMER – NYLON
FRETZ PLANISHING HAMMER
ECONOMY TABLETOP SWIVEL VISE
JUMP RING MAKER – SMALL 4MM – 8MM
PLIERS – LINDSTROM EX SERIES – SIDE CUTTER
PLIERS – LINDSTROM EX SERIES – FLAT NOSE
PLIERS – FLAT NOSE
FOREDOM® SR-2220 FLEXIBLE SHAFT KIT – #20 QUICK CHANGE HANDPIECE
SANDING DISCS – ADALOX SNAP ON – 7/8″ MEDIUM
MINIATURE MANDREL – SNAP ON 3/32″ SHANK
SILICONE POLISHER – BLACK BARREL SET – SET OF 4
SMITH® SILVERSMITH™ ACETYLENE AND AIR TORCH KIT WITHOUT TANK
360° ROTATING SOLDERING PAN WITH PUMICE – 12″ DIAMETER
SOLDERING BLOCK – MAGNESIA
HANDY FLUX 8 OZ
CAMEL HAIR ECONOMY BRUSH – SIZE 3
SILVER SOLDER WIRE- HARD & MEDIUM